Creating Banners: A Guide to Specific Image Dimensions (like 300x80)
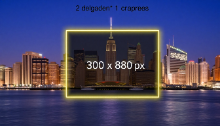
Have you ever tried to upload an image for a website banner, a forum signature, or a display ad, only to be told it must be an exact size, like 300x80 pixels? This can be a frustrating experience if you're not familiar with image editing. These precise requirements are common in web design and advertising to ensure that layouts remain consistent. This guide will show you how to easily create images with specific dimensions using free online tools.
Why Are Specific Dimensions Required?
Websites and ad networks use strict dimensions for several reasons:
- Layout Consistency: Predefined sizes ensure that the website's design doesn't break when new images are uploaded.
- Ad Standards: The Interactive Advertising Bureau (IAB) sets standard ad sizes (like the 300x250 Medium Rectangle or 728x90 Leaderboard) so that ads can run on different websites.
- User Experience: Properly sized images prevent content from shifting as the page loads, which is a key factor in Google's Core Web Vitals.
Resizing vs. Cropping: What's the Difference?
To get an image to exact dimensions, you'll likely need to use a combination of resizing and cropping. It's essential to understand the difference.
- Resizing: This changes the overall size of the image while keeping the original aspect ratio. For example, you can resize a 1200x800 image down to 600x400. Everything in the image is still there, just smaller.
- Cropping: This involves cutting away parts of the image to make it fit a new aspect ratio. If you need to turn your 1200x800 photo into a 300x80 banner, you will have to crop out a significant portion of the original picture.
How to Create an Image with Exact Dimensions
Most dedicated online "image resizer" or "cropper" tools make this process simple. Here’s a general step-by-step method:
- Upload Your Image: Start by uploading your source photo to an online image editor or a specialized resizing tool.
- First, Resize (Optional but Recommended): If your image is very large (e.g., 5000px wide), it's a good idea to resize it to be closer to your target width first. For a 300x80 banner, you might resize your image so its width is, for example, 400px. This makes the cropping step easier to manage. Make sure to keep the aspect ratio locked during this step.
- Use the Crop Tool: Find the crop tool. Most online editors will have an option to set a fixed aspect ratio or a fixed size. Enter your exact dimensions (e.g., 300 for width and 80 for height).
- Adjust the Crop Box: A selection box with the correct proportions will appear on your image. You can drag this box around to choose the most important part of the image you want to keep. You can also typically resize the box (while it maintains the aspect ratio) to zoom in or out on your subject.
- Apply and Save: Once you've positioned the crop box perfectly, apply the crop. Your image will now be trimmed to the exact dimensions you specified. You can then download the final image, usually as a JPG or PNG.
Creating images with specific dimensions might seem technical, but with the right free tools, it's a quick and easy process. Mastering this skill is essential for anyone who regularly works with digital content.