Converting Photos for Different Uses: A Practical Guide
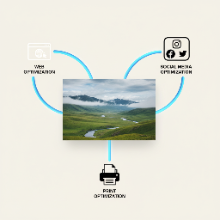
You’ve just taken a great photo. Now, what do you do with it? The way you save and convert that photo should depend entirely on its final destination. A photo destined for a website has very different needs from one you plan to print on a large canvas. Using a photo converter with the right settings is key to getting the best results. Here’s a practical guide to converting photos for the most common uses.
1. Converting Photos for the Web
When it comes to websites, blogs, and email, the primary goal is to achieve the smallest possible file size without a noticeable drop in quality. This ensures your pages load quickly.
- Format: Convert your photo to WebP for the best compression, or JPG for universal compatibility. Avoid PNG for photos, as it will create unnecessarily large files.
- Dimensions: Resize the photo to the maximum size it will be displayed. A full-width hero image might be 1920px wide, but a photo inside a blog post might only need to be 800px wide. Uploading a 5000px wide photo is a common mistake that slows down websites.
- Compression: Use a tool that allows you to adjust the quality. A JPG quality setting between 70 and 85 usually offers the best balance of size and clarity.
2. Converting Photos for Print
For printing, quality is paramount. File size is a secondary concern. The goal is to preserve as much detail and color information as possible.
- Format: While professionals might use TIFF, a high-quality JPG (saved at 95-100% quality) is excellent for most printing needs. Converting to a lossless format like PNG is also a good option if your printing service accepts it.
- Resolution (DPI): This is where DPI (Dots Per Inch) matters. The standard for high-quality printing is 300 DPI. Ensure your image has enough pixels to support this density at your desired print size. For example, to print a 4x6 inch photo at 300 DPI, your image needs to be at least (4*300) x (6*300) = 1200x1800 pixels.
- Color Space: Most consumer print labs work in the sRGB color space, which is the default for most cameras and web images. For professional printing, you might be asked for CMYK, which requires specialized software to convert properly.
3. Converting Photos for Social Media
Social media platforms have their own rules. They will automatically compress your images, so your goal is to upload a photo that's optimized to survive this process with minimal quality loss.
- Format: JPG is the safest and most common format for all platforms.
- Dimensions & Aspect Ratio: This is the most important factor. Each platform has optimal dimensions. For instance, Instagram favors square (1080x1080px) or vertical (1080x1350px) images. Uploading a photo with the correct aspect ratio prevents the platform from awkwardly cropping it.
- File Size: Keep your file size reasonable (e.g., under 2-3 MB). While platforms don't have strict upload limits, a well-optimized image often looks better after their compression algorithms are applied.
By using a versatile photo converter and keeping the end-use in mind, you can ensure your images look their best everywhere they appear.