Mastering Image Resizing: How to Change Dimensions Without Losing Quality
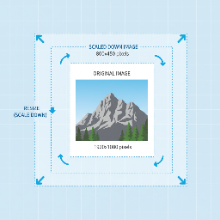
Whether you're a web developer, a social media manager, or just someone who wants to email a photo, you've probably faced the challenge of image resizing. An image that's too large can slow down your website, while one that's too small will look blurry and unprofessional. This guide will teach you the fundamentals of resizing images correctly to get the perfect dimensions without sacrificing quality.
Key Concepts: Dimensions, Resolution, and Aspect Ratio
Before you start resizing, it's essential to understand a few key terms:
- Dimensions: This refers to the width and height of an image, measured in pixels (e.g., 1920x1080 pixels).
- Resolution: Often confused with dimensions, resolution is the density of pixels, usually measured in DPI (dots per inch). For web images, this is less important than pixel dimensions. For print, 300 DPI is standard.
- Aspect Ratio: This is the proportional relationship between the width and height of an image. A 4x6 photo has a different aspect ratio than a square 1x1 Instagram post. Maintaining the aspect ratio is crucial to avoid stretching or squashing your image.
When to Resize Your Images
Resizing isn't just about making files smaller. It's about fitting an image to its intended context. Here are common scenarios:
- Websites: Large images are a primary cause of slow-loading pages. You should resize images to the maximum dimensions they will be displayed at on your site. A full-width banner might be 1920px wide, but a blog post image might only need to be 800px wide.
- Social Media: Each platform has its own optimal image dimensions for posts, profile pictures, and headers. Using the right sizes ensures your images look sharp and are not cropped awkwardly.
- Email: Large image files can cause emails to be rejected or land in spam folders. Resizing them makes your emails load faster for the recipient.
How to Resize Without Losing Quality
The golden rule of resizing is that you can always make an image smaller, but you can't make it significantly larger without losing quality. When you enlarge a raster image (like a JPG or PNG), the software has to guess what the new pixels should look like, which often leads to blurriness or "pixelation."
Using an Online Resizing Tool
For most users, an online tool like our Bulk Image Converter is the easiest solution. Here’s how it works:
- Upload your image(s).
- Enter your desired dimensions. Most tools, including ours, allow you to set a maximum width and/or height.
- Keep the "Maintain Aspect Ratio" option checked. This is critical. When you enter a new width, the tool will automatically calculate the correct height to prevent distortion.
- Convert and download. The tool will process the image and provide a new, perfectly sized version.
By understanding the basics of image dimensions and using the right tools, you can ensure your images always look professional and load quickly, no matter where they're displayed.